Using the dual monitor setup in Windows 10 can help you increase productivity. It will be particularly helpful when your work comprises of working on multiple monitors. However, if you want to change the dual monitor set up and switch to single monitor then this article is for you.
Although you can simply disconnect the cable to remove the either monitor and it will help you to convert dual monitor set up into single one. But to switch from dual monitor to single monitor, you do not need to disconnect either of the monitor and you can simply make this possible using the settings on your system.
You can use either of the methods mentioned below to achieve this:
Switch from dual monitor to single in Windows 10
Using Windows Settings
- Open Settings app, using Windows + I keys.
- Now go to System > Display.
- In Display, under Multiple displays drop-down list, select Show only on (number) option, where number could be the actual number of display monitor.
- In this way you can remove the monitors you do not want and leave the monitor which you want to let remain as single monitor setup.
Close Settings app at your configured settings will be applied immediately.
Using the Intel Graphics Control Panel
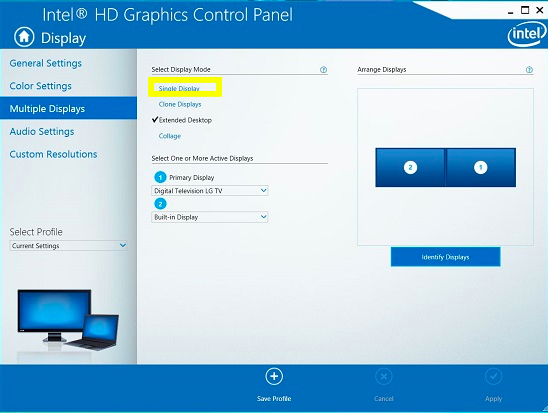
- Using Start Menu, search for the Intel Graphics Control Panel. Double click the Intel® Graphics Control Panel icon from results.
- Click Display > Multiple Displays.
- Select the Single Display mode and click Apply.
Using NVIDIA Control Panel
- Open the NVIDIA Control Panel on your computer.
- Go to Display > Setup multiple displays from the left sidebar.
- Uncheck the monitor you want to remove from the dual monitor configuration and click Apply.
So in this way you can Switch from dual monitor to single monitor configuration in Windows 10.
Hope you find the article useful!