If you are using WordPress for a very long time, you may find it really easy to change WordPress media upload directory in media Settings. Usually the default folder for media upload is wp-content/uploads inside your domain name. However with recent versions, WordPress removed the option to change default media upload location. So we can no longer change the default directory in which we could upload media, using WordPress settings. In this article, we will learn how you can resolve this problem and upload media to the directory of your wish.
How to change WordPress media upload directory?
Method 1 – Using WP-CONFIG File
The first method to resolve this problem is by configuring wp-config.php file. You have to login to root directory of your website and add following lines in the bottom of the file:
define(‘UPLOADS’, ‘DIRECTORY’);
Make sure you replace your DIRECTORY with location of your own folder, on which you want to upload media files. For example if I want to change the default media upload location for a site (https://example.com/wp-contents/uploads) to (https://example.com/images), I’ll simply add define(‘UPLOADS’, ‘images’) to the wp-config.php file.
Method 2 – Using plugin
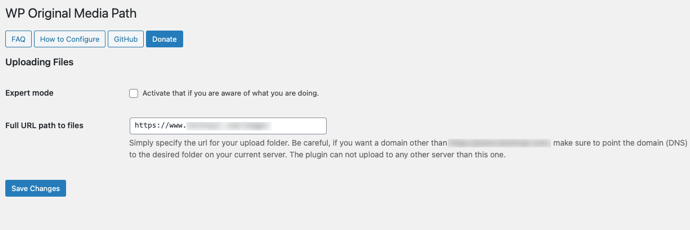
If you are not comfortable in editing wp-config.php file, here is the alternative method for you. You can install WP Original Media Path plugin. Once installed, activate the plug-in and go to Settings. You will see there, Full URL path to files option. Just change it to the location of folder you want to upload media. Now save those settings by clicking on Save Changes.
Now simply upload the media to the WordPress site. Click on the uploaded media to get its details. You will find that the media is now uploaded to your changed upload location. If you do not want the media to be arranged in year and month, you can uncheck the relevant option in older media settings.

Hope you find the article useful!