In the world of Internet, DNS (Domain Name System) is like the phone book. In earlier days, we all have used telephone directory to find out a telephone number and connect to it. Similarly, if you want to visit a website, you usually type in a domain name like bing.com. Here, DNS plays important role and convert the domain name into IP address. All the computers and web servers can communicate in the IP address format. So it will be now is it that you will be able to land website you want with the IP address and DNS servers. In this article, we’ll see how to change your DNS Server on a Mac.
An IP address is basically a string of characters which is separated by periods and comas. For example, one IP address for this website i.e. technoyl.com is 173.245.58.132. However, a DNS address is only one part of the equation these days. Sir it is not possible for you to land to a website only using the IP address. All of the IP addresses are converted to a human friendly name which is called domain. A domain name helps you to land on a website, for example, technoyl.com.
Your Internet Service Provider (ISP) can assign you a DNS when you connect to their network. However, if for some anonymous reason you want to change your DNS server on your Mac, you can always follow below steps.
How to change your DNS Server on a Mac?
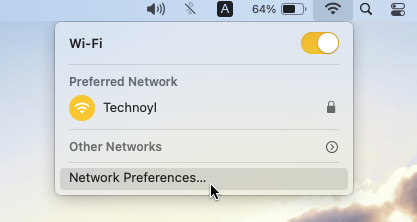
1. Click on the network icon on the top of your MacBook screen. In the context menu, click on Network Preferences.
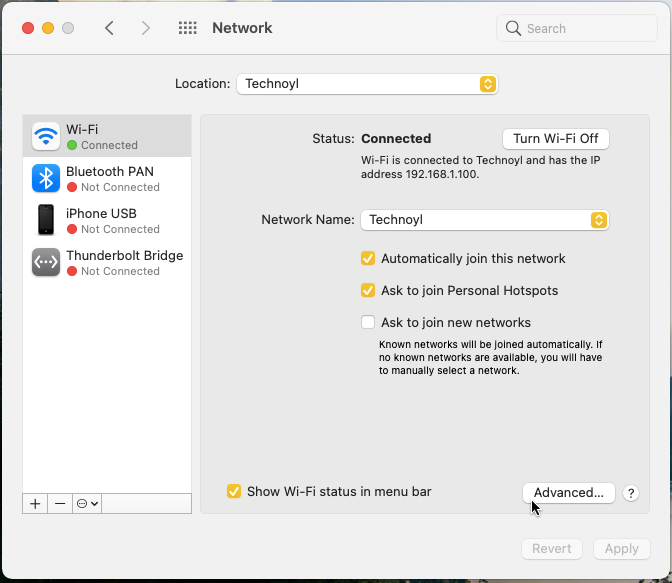
2. This will open System Preferences inside Network section. In the left pane, select the network you are currently connected to. In this example, we are connected to Wi-Fi network, so we selected it. Click on the Advanced button.
3. In the next screen, click on DNS tab and then click + icon to add a DNS server address.
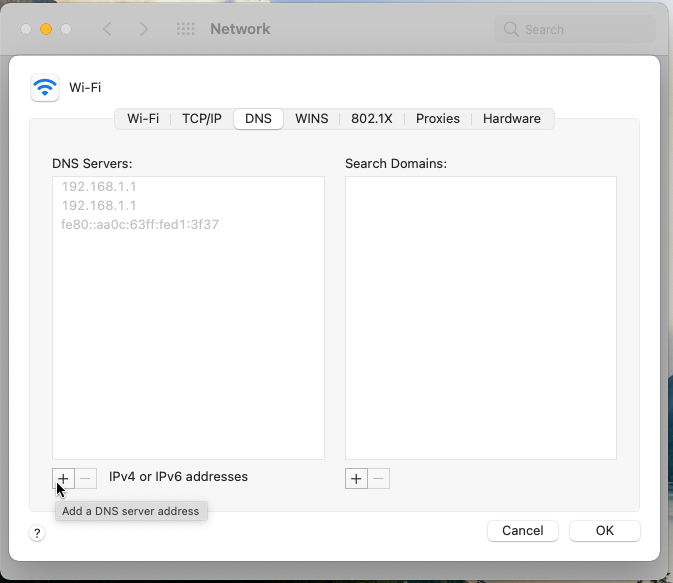
4. Now type in the DNS server address you want to use. Usually, following 3 DNS servers are mostly used:
- Google Public DNS: 8.8.8.8 and 8.8.4.4
- Cloudflare: 1.1.1.1 and 1.0.0.1
- Cisco OpenDNS: 208.67.222.123 and 208.67.220.123
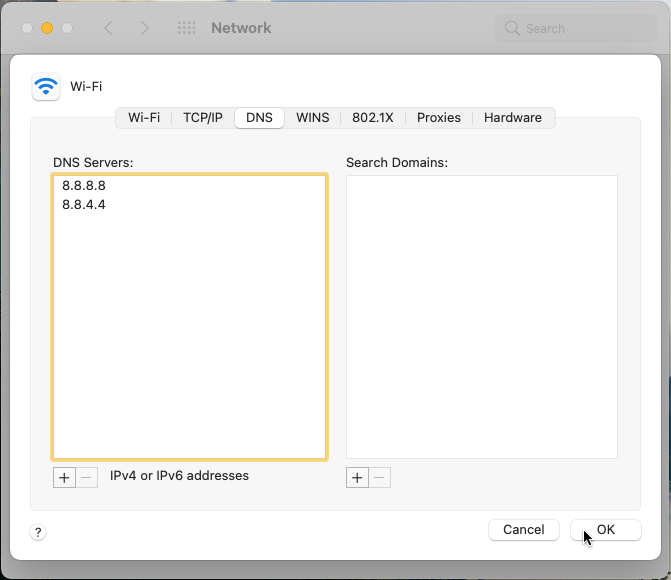
Once you input the values of DNS server address, you can click on OK to see your settings.
In this way, you have successfully changed the DNS server settings on your Mac.
That’s it!