A WiFi network that the owner has decided not to show the SSID (name) is called hidden Wifi network. It usually doesn’t appears in list of available WiFi networks. In case if you know such a hidden Wifi network details, it is possible to connect to this network manually.

How to connect to hidden WiFi networks?
You will need following information in order to connect to hidden Wifi network.
- SSID i.e. network name
- Type of security applied
- Type of encryption applied
- Security password
Steps to connect to hidden network on various operating systems.
Windows 10
- Go to Settings app > Wi-Fi > Hidden Network > Connect.
- Enter the SSID (network name).
- Click Next.
- Enter the network security key (password).
- Click Next.
You should be now connected to hidden Wifi network.
Windows 8.1
- Open Network and Sharing Center by running
ncpa.cplcommand. - Select Set up a new connection or network.
- Click Next.
- Select Manually connect to a wireless network.
- Click Next.
- Enter the Network name, Security type, Encryption type, and Security Key (password).
- Click Next.
You should be now connected to hidden Wifi network.
Windows 7 and Windows Vista
- Open Network and Sharing Center by running
ncpa.cplcommand. - Click Add > Manually create a network profile.
- Enter the Network name, Security type, Encryption type, and Security Key (password).
- Select Start this connection automatically.
- Select Connect even if the network is not broadcasting.
- Click Next.
You should be now connected to hidden Wifi network.
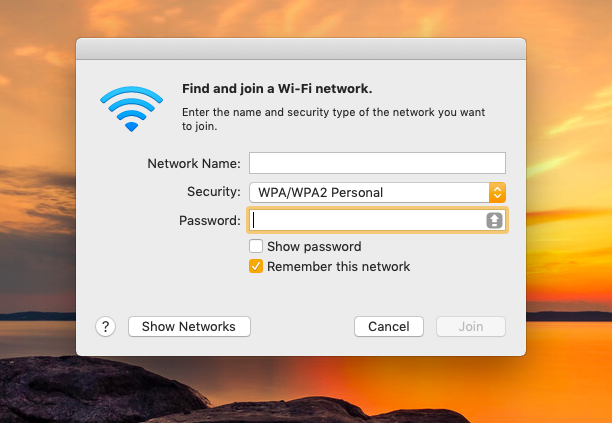
Mac OS X
- In the upper-right corner of your screen, click the WiFi icon.
- A network menu appears.
- Click Join Other Network.
- Enter the Network Name, Security type, and Password.
- If you want to automatically connect to this network in the future, select Remember this network.
- Click Join.
You should be now connected to hidden Wifi network.
iOS
- Select Settings > Wi-Fi > Other.
- Enter the network name, security type, and password.
- Tap Join.
You should be now connected to hidden Wifi network.